
Showing posts with label Drawing. Show all posts
Showing posts with label Drawing. Show all posts
Sunday, 18 December 2016

Saturday, 17 December 2016

Friday, 18 November 2016

Sunday, 13 November 2016

Tuesday, 3 February 2015
Making a 2D game: Victory is Mine
This is a game made for the global game jam 2015 at my local venue, AIE Canberra. Basically we have 48 hours to make a game, then we present to the other groups. It was a fun event, i wish that more game jams would happen during the year itself.
Victory is mine is the title of this game i worked on with my team, it's a play on the word 'MINE' because it takes place in a Mining environment. The idea is that it's two player with an area for each player to progress to the right hand side of the screen. Opponents trip switches which activate traps and obstacles on the opposite player's area. Unity engine was being used, in 2D top down format. The traps are health damaging, causing one player to own victory, as stated by the title. Unfortunately we didn't finish the game in time, but we had catchy background music which was our saving grace.
Assets made by me include a series of mining tracks, industrial pipes and leaking toxic barrels which will be displayed below. These were made in Autodesk Maya first, then rendered with neutral top-down lighting so that they can be placed in any rotation. Then i painted over them in photoshop to give them the stylized look. I then saved them as png's so that they can have the alpha channel (while still keeping the .psd files so i can play with them later).


Victory is mine is the title of this game i worked on with my team, it's a play on the word 'MINE' because it takes place in a Mining environment. The idea is that it's two player with an area for each player to progress to the right hand side of the screen. Opponents trip switches which activate traps and obstacles on the opposite player's area. Unity engine was being used, in 2D top down format. The traps are health damaging, causing one player to own victory, as stated by the title. Unfortunately we didn't finish the game in time, but we had catchy background music which was our saving grace.
Assets made by me include a series of mining tracks, industrial pipes and leaking toxic barrels which will be displayed below. These were made in Autodesk Maya first, then rendered with neutral top-down lighting so that they can be placed in any rotation. Then i painted over them in photoshop to give them the stylized look. I then saved them as png's so that they can have the alpha channel (while still keeping the .psd files so i can play with them later).
Monday, 3 November 2014
Human Male character : Concept to Final
This was posted earlier this year, however a glitch happened and some images that i uploaded went missing and posts had to be updated to be fixed. luckily it only took one night. This concept presentation was one of the images that went missing and i thought i might just re-post it. The original post just got cleaned up, features just separate renders of both the African and Caucasian males and the original concept art of all the ideas generated before settling with the business suit.
 |
| The character went as planned, it was a simple concept, i couldn't think of a back story for these characters |
Story-wise, this character was somewhat not applicable being just a background feature for renders and game environments, but i would note down possible scenarios that they can be featured in (such as an office interior render, a sandbox type game that takes place in an urban environment), or i could say "there once was a man who walked to work with his briefcase, the end". Stepping away from the sarcasm, this was a fun project, however skinning the mesh to the rig was probably a hair grabbing experience which i hope to get better at. Here are a couple of screenshots of the high poly models....


Monday, 27 October 2014
Chain Link Fence Alpha Map
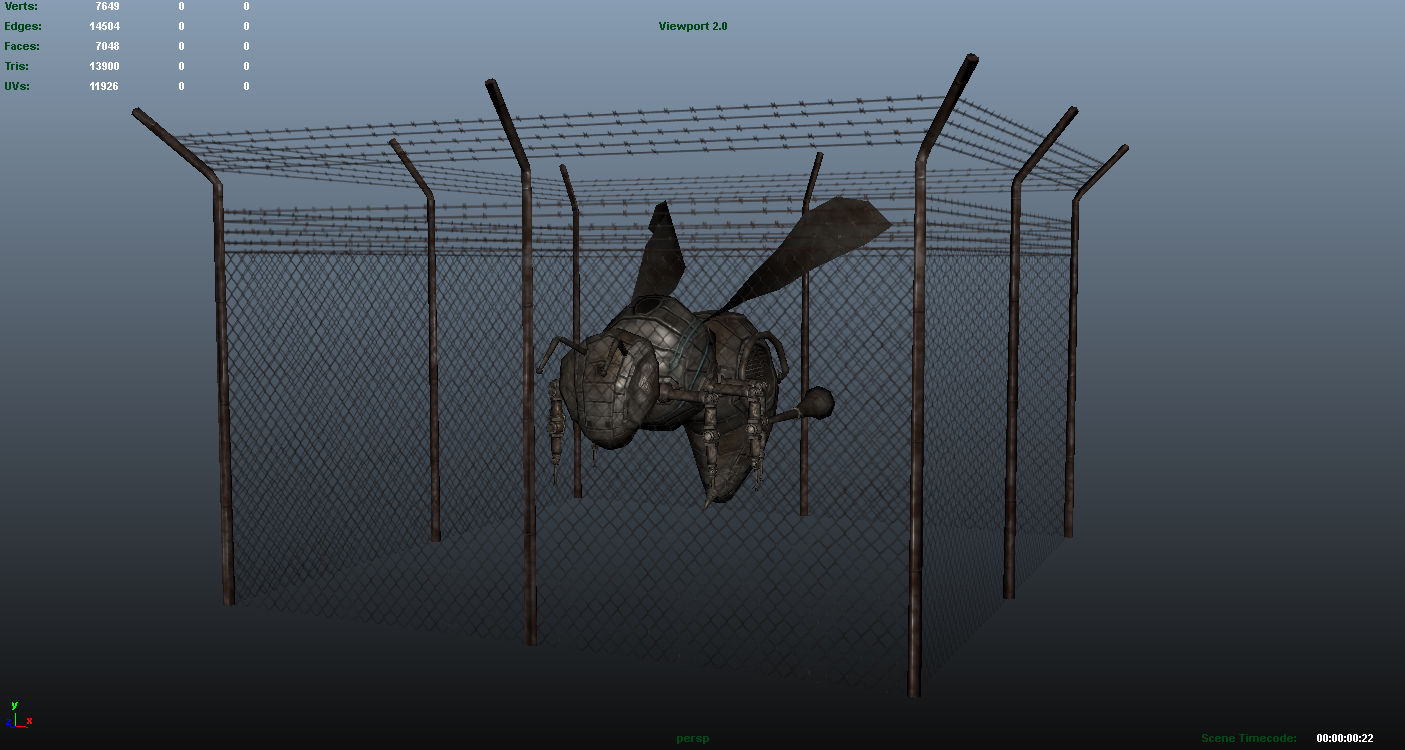 |
| The Alpha seems to be working in Maya. Despite Having back-face culling turned on, the .tga file texture of the fence remains double sided |
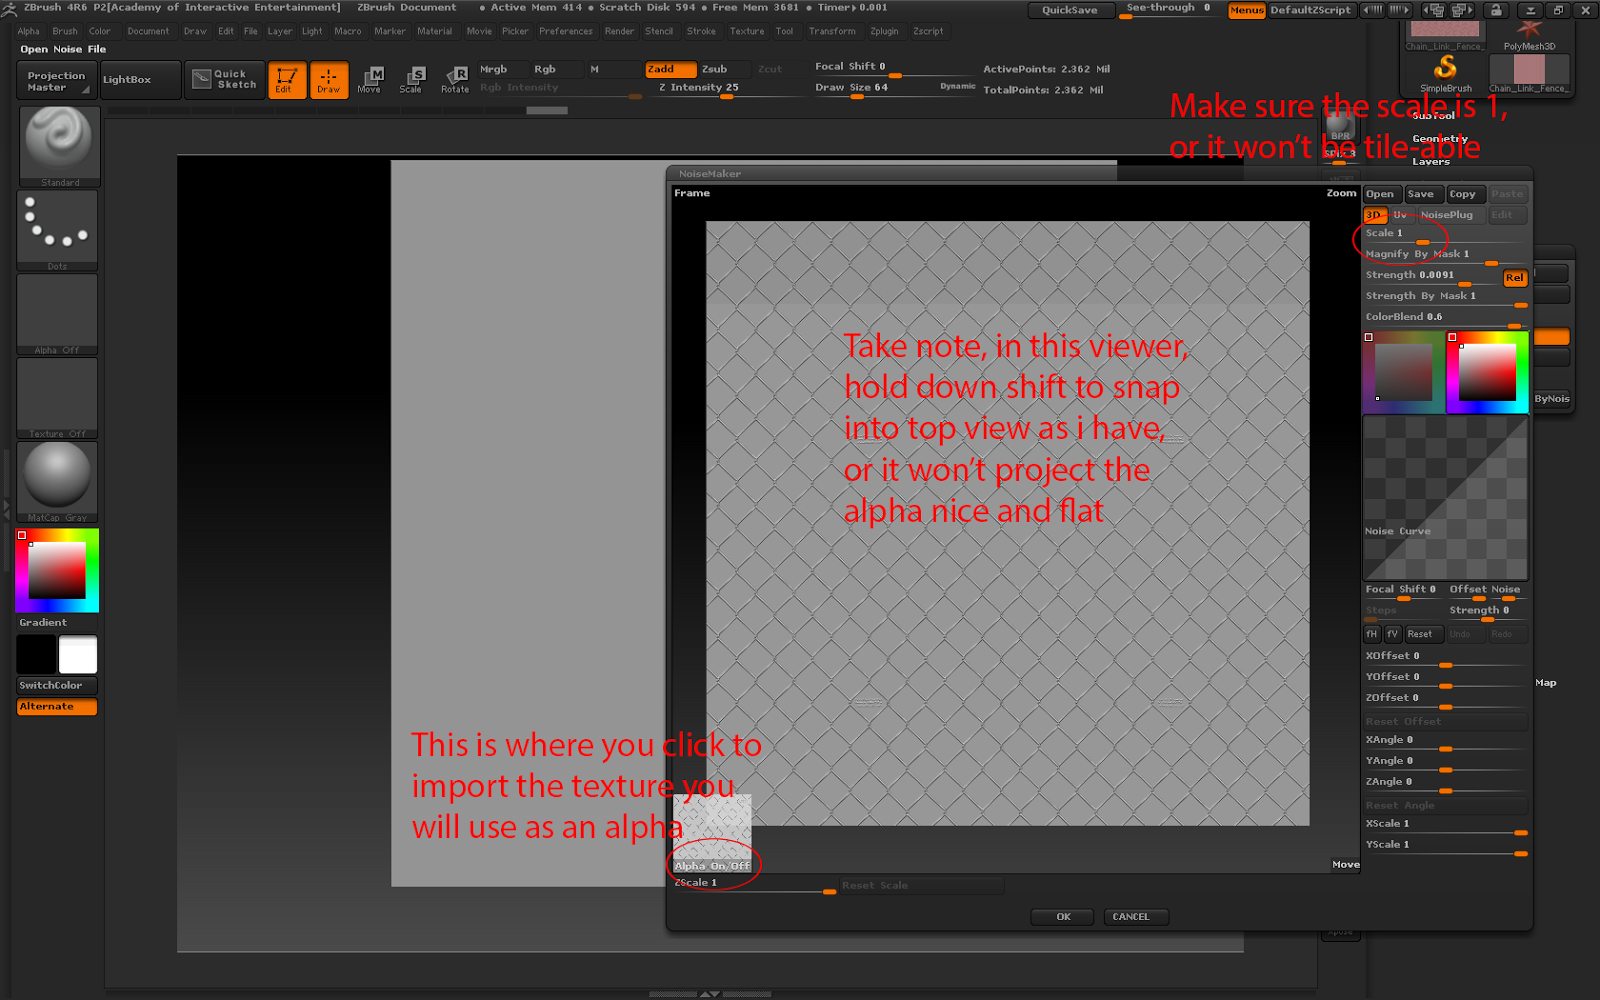 |
| My instructions are in red text |
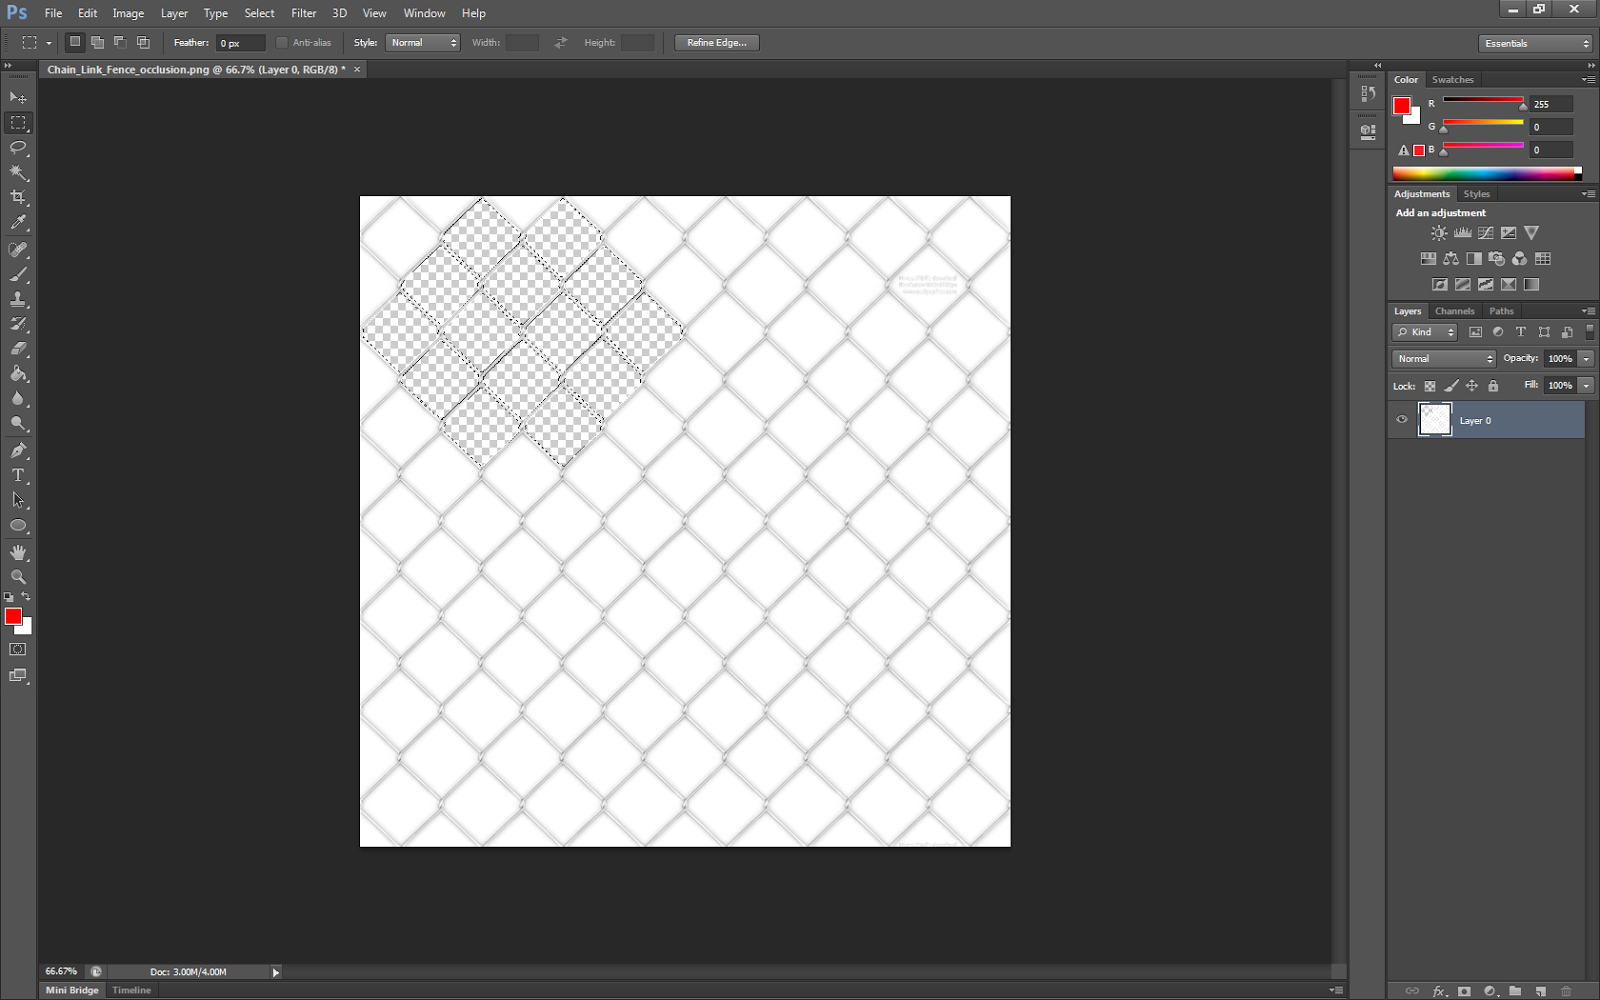 |
| Using the ambient occlusion i have achieved from Xnormal, i make selections in Photoshop, modify the border sizes of those selections and hit delete so i can achieve the gaps between the chain links |
Wednesday, 1 October 2014
RoboBee or Robotic Steampunk Bee: An old project from a year ago restored like an old car
I got a bit bored during my time at school and just foraged through my memory sticks then ran into this Robotic Bee which i totally forgot about, so being bored i decided to pick up from where i gave up. To me it's not a success, the poly count is far to high for being involved in large swarms and there was never any colored concept art done for it. However better than nothing, i decided to have a go texturing it then rigging it so at least it can do something. I spent hours on it, after all it's worth doing. Some say do not be afraid to start again regardless of a project remaining unfinished, some say continue until it's done, or work on multiple projects so if i get bored of one, work on the other. Many ways of dealing with projects leads to a grey area on what is the best approach or pipeline workflow, but i decided to have a crack at restoring projects like restoring a vintage car. So here we have a Bee that started as a tutorial in class on how to model and texture basics which was to look like your average bee, became a clean metallic robot, finally deciding on a rusted post apocalyptic look that's been rigged and fully colored and textured.
Thanks for viewing.
Here we have the high poly model, i added more detail after that which you'll see on the final product.


Thanks for viewing.
 |
| The original Design, as i mentioned lack of color |
 |
| Work in Progress |
 |
| Side Progress |
Now for the final look.
 |
| I used an alpha in Zbrush to get this detail on the eyes, it was a tile-able microphone texture |
My Bee has iron guts. Yeah
Tuesday, 16 September 2014
Trubbish and Garbodor remind me of cookie dough
I remember first seeing these two Pokemon, m&ms embbedded into their doughy bodies. i think they're quite funny looking pokemon in an adorbale way.
So i drew this in my spare time:

Monday, 28 July 2014
Human Male Character
 |
| Concept Art |
 |
| African Male Civilian in Suit |
 |
| Caucasian Male in Suit |
 |
| High Poly of African Male |
 |
| High Poly of Caucasian Male |
Monday, 7 April 2014
Tribal Temple Concepting Continued
 |
| Some Color Schemes to choose from, ended up deciding with the greenish one |
 |
| Tribal Jars and Containers |
Subscribe to:
Posts (Atom)